Preparing for Window and Door Installation Day
What to expect on installation day, how to prepare your home, and how to make the process smooth from quote to cleanup.
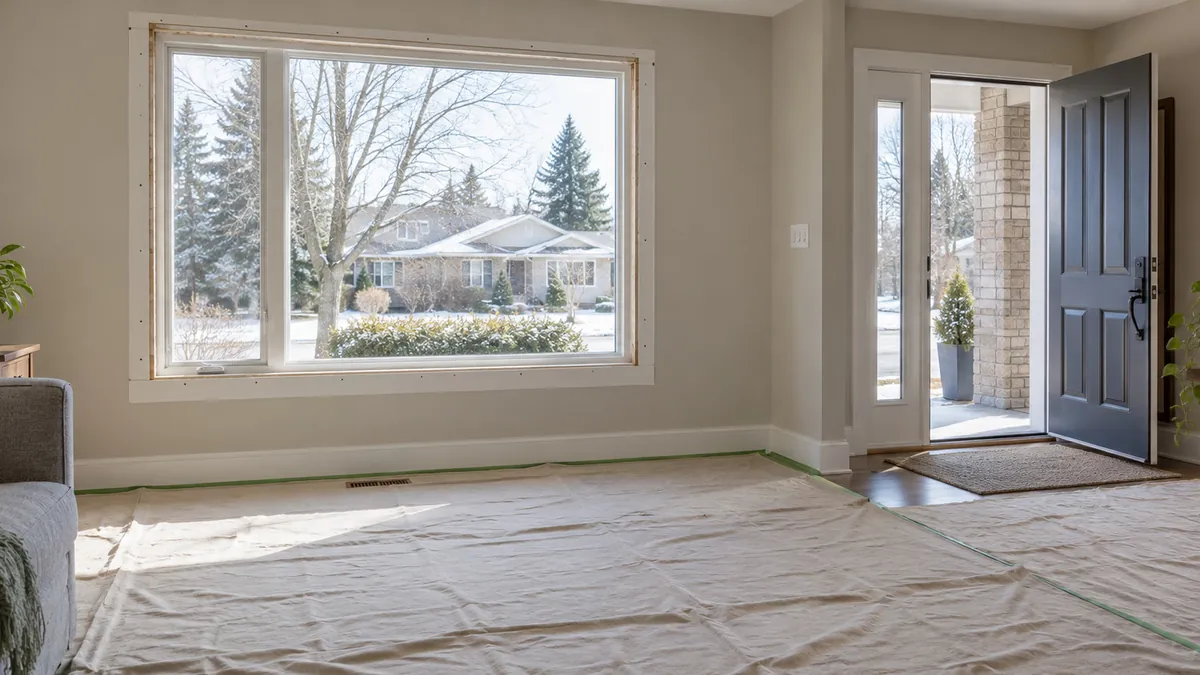
Installation day is when a window or door project moves from planning to reality. Knowing what to expect and preparing your home in advance makes the day go faster, protects your belongings, and reduces the chance of surprises.
This guide walks through what happens before, during, and after installation, how to prepare each room, and what to check before the crew leaves. It is written for Canadian homeowners replacing windows or exterior doors, whether one unit or a whole-home project.
Before Installation Day
Preparation starts before the crew arrives. A few steps in the days leading up to the appointment save time and prevent damage.
Confirm the Details
- Verify the date, time, and expected crew size.
- Confirm which windows or doors are being replaced and where.
- Ask how long the work will take and whether the home will be weather-tight at the end of each day.
- Confirm whether the crew will remove and dispose of old units.
- Ask whether permits are required and who has obtained them.
- Get a contact name and phone number for the crew lead on the day.
Clear the Work Area
- Move furniture, plants, and decorations away from windows and doors being replaced.
- Remove curtains, blinds, and window treatments from the openings.
- Clear the sill and the floor around each window so the crew has room to work.
- Move breakable items from nearby shelves and walls; vibration from installation can knock things over.
- For door replacements, clear the entry path and the area on both sides of the door.
- Remove area rugs from the path between the entry and each work area.
Protect Floors and Belongings
- Lay drop cloths or protective flooring along the path from the entry to each work area.
- Cover furniture that cannot be moved with sheets or plastic.
- Seal off rooms not being worked on if dust is a concern, especially with older homes where lead paint or asbestos may be present.
- Close doors to rooms where you do not want dust or debris.
Plan for Access and Pets
- Arrange parking for the crew and space for materials near the work area.
- Keep pets in a room away from the work zone, or arrange for them to be elsewhere for the day.
- Plan for children to be out of the work areas during active installation.
- Identify a single point of contact for the day, usually you or a designated person.
Prepare for Disruption
- Windows and exterior doors will be open to the outside for periods during installation. Plan for temperature changes in the home.
- If only one exterior door is being replaced, arrange an alternate way in and out for part of the day.
- Expect noise from tools, removal of old units, and construction work.
- Plan for the possibility that one window at a time will be out, so some rooms may be cooler or noisier than others.
What Happens on Installation Day
The exact sequence depends on the number of units and the installation method, but a typical day follows this pattern:
- Arrival and setup. The crew reviews the scope, protects floors, and stages materials.
- Removal of old units. Existing windows or doors are taken out, and the openings are inspected.
- Opening preparation. The rough opening is cleaned, levelled, and checked for damage. Flashing and sealing details are addressed.
- Installation of new units. New windows or doors are set, shimmed, levelled, and secured.
- Insulation and sealing. Gaps between the frame and opening are insulated and sealed.
- Hardware and finishing. Locks, handles, weatherstripping, and trim are installed.
- Cleanup. Debris is removed, tools are collected, and the work area is cleaned.
- Walkthrough. The crew demonstrates operation and reviews the work with you.
For insert replacement, the existing frame stays and the new unit fits inside it. For full-frame replacement, the old frame is removed and a new frame is installed, which is more invasive and may touch siding, drywall, or flooring.
What the Crew Should Do
A professional installation team should:
- Protect your floors, furniture, and finishes.
- Keep the work area contained and clean as they go.
- Explain what they are doing and answer questions.
- Verify that each window and door operates, locks, and seals before moving on.
- Remove old units and packaging, unless you have arranged to keep them.
- Leave the home weather-tight at the end of each day.
If anything feels rushed or incomplete, ask questions before the crew leaves.
What You Should Check Before They Leave
Walk through each installed window and door:
- Open and close every unit fully. Operation should be smooth.
- Lock and unlock each unit. Latches and deadbolts should engage without force.
- Check for even gaps around the frame and sash.
- Confirm weatherstripping seals when closed.
- Inspect the interior and exterior trim for gaps or damage.
- Verify that weep holes and drainage paths are clear.
- Ask about any touch-up painting or finishing that remains.
- Confirm the warranty paperwork and care instructions.
Do not wait until after the crew leaves to report a problem. Issues found on installation day are easier to address immediately.
Insert vs Full-Frame: What to Expect
Our insert versus full-frame comparison explains why the amount of trim removal and preparation can differ.
Insert replacement is faster and less disruptive. The crew works mostly inside the existing frame. There is less impact on trim, siding, and interior finishes. The opening may be ready the same day.
Full-frame replacement removes the old frame and surrounding materials. It takes longer, creates more debris, and may require siding, drywall, flooring, or exterior finishing work afterward. The opening may be exposed overnight, so weather protection is important.
Ask which method applies to each opening so you know what to expect.
Seasonal Considerations
Installation timing affects comfort and risk:
- Spring and summer: Busy season for contractors. Book ahead. Warm weather makes exterior sealing and finishing easier.
- Fall: Often good availability and mild weather. A strong choice before winter.
- Winter: Installation is possible with proper protection of the opening. Sealants need suitable conditions, and delays are more likely in extreme cold or storms.
- Rain and wind: Can pause exterior work. Ask how the crew will protect an open opening.
For door replacement, consider overnight security if the only entry door will be out of commission for part of the day.
Communicating With the Crew
- Identify a single point of contact for the day, usually you or a designated person.
- Ask the crew lead to walk you through the plan before starting.
- Point out any concerns, such as fragile finishes, access constraints, or pets.
- If something looks wrong during installation, speak up immediately rather than waiting.
Clear communication prevents most misunderstandings.
After Installation
- Keep receipts, warranty documents, and product labels together.
- Note the date of installation and the installer's name.
- Operate each window and door daily for the first week to confirm everything works.
- Watch for settling, new gaps, or operating issues in the first season.
- Follow the manufacturer's care instructions for cleaning and maintenance.
- Register warranties if required by the manufacturer.
Frequently Asked Questions
Do I need to be home during installation?
It is best to be available, at least at the start and end of the day, to answer questions and do the walkthrough.
Will my home be cold while windows are out?
Openings are usually covered or closed at the end of each day. During active installation, individual openings may be exposed for short periods.
How long does installation take?
One window or door may take a few hours. A whole-home project often takes several days. Ask for a schedule before the work starts.
Do I need to remove my blinds and curtains?
Yes, remove them from the openings being replaced to prevent damage and give the crew access.
Will the crew clean up?
A professional crew should remove debris and clean the work area. Confirm this in the quote.
What if I find a problem after the crew leaves?
Contact the company promptly. Most issues are easier to resolve when reported soon after installation.
Installation Cost Expectations
Treat any figure you see online as a planning range rather than a quote. The actual price depends on the number of units, the installation method, the condition of the openings, and access.
As a general planning guide:
- Single window or door insert: usually the lowest-cost option, because it is fast and less invasive.
- Full-frame replacement: a higher cost, because it includes a new frame, flashing, trim, and disposal.
- Whole-home project: often a lower per-window price because setup and access are shared, but the total is higher.
- Upper-floor or difficult access: adds labour for ladders, scaffolding, or extra crew time.
- Hidden damage repair: variable, and can rise if rot or water damage is found once units are removed.
- Permits and disposal: confirm whether these are included or extra.
Ask for a written quote that separates the units, installation, trim, disposal, permits, and labour. A single lump sum makes it hard to compare scope fairly.
Working With Your Installation Contractor
A good contractor will:
- Inspect each opening before quoting, not rely on your measurements alone.
- Explain whether insert or full-frame is appropriate for each window or door.
- Protect your floors, furniture, and finishes during the work.
- Verify that each unit operates, locks, and seals before moving on.
- Leave the home weather-tight at the end of each day.
- Provide written warranty details for product and workmanship.
If a contractor quotes without visiting your home, or will not put the scope in writing, get another quote.
Installation Day Quick Reference
- Move furniture and breakables away from each window and door.
- Remove curtains and blinds from the openings being replaced.
- Clear sills and floors around each opening.
- Protect floors along the path from entry to work areas.
- Arrange for pets and children to be away from work zones.
- Plan for windows to be open to the outside during installation.
- Open, close, lock, and unlock every unit before the crew leaves.
- Confirm warranty paperwork and care instructions before they go.
Do I need to be home during installation?
It is best to be available at the start and end of the day to answer questions and do the walkthrough.
Will my home be cold while windows are out?
Openings are usually covered or closed at the end of each day. Individual openings may be exposed briefly during work.
Do I need to be home during installation?
It is best to be available at the start and end of the day to answer questions and do the walkthrough.
Will my home be cold while windows are out?
Openings are usually covered or closed at the end of each day. Individual openings may be exposed briefly during work.
Do I need to be home during installation?
It is best to be available at the start and end of the day to answer questions and do the walkthrough.
Will my home be cold while windows are out?
Openings are usually covered or closed at the end of each day. Individual openings may be exposed briefly during work.
Next Steps
Preparation makes installation day smoother for everyone. Windoorly can walk you through the scope, timeline, and what to expect for your window or door project.